Use the script "Pixels!" for a retro pixel image composition in Gimp.
The following requirements must be met:
- Gimp 2.10
- Download Gimp
- 2 layers must be available "background", "area-brush"
- Please read the following tutorial
- LayerFX
- LayerFX for 2.8 (Python-Fu)
1. Installation
- unpack the archive
- The .zip archive from GitHub is structured (folder hierarchy) as you find it in their local Gimp install directory. Copy all files/ folders in this directory "C:\Program Files\GIMP 2\share\gimp\2.0" or use Gimp User Folder "C:\Users\Your User Name\.gimp-2.8\" (Gimp v2.10: "C:\Users\Your User Name\AppData\Roaming\GIMP\2.10")
- Now start Gimp
- template
- for a quick start, you can use the template "pixels.001.xcf"
Prepare the picture
- Open an image of your choice (RGB, RGBA)
- good results I have conceded with image sizes of 2500px and higher (picture 1)
create a new layer ("area-brush") and "mask" your object (picture 2) -
Please pay attention to the correct spelling of all 2 layers "background" and "area-brush" (picture 2).
3. start Script
paintbrush setting
-
make the following paintbrush settings (picture 5, circled in red) "Apply Jitter" before running the script. At a value between 12-20 you achieve very good results.
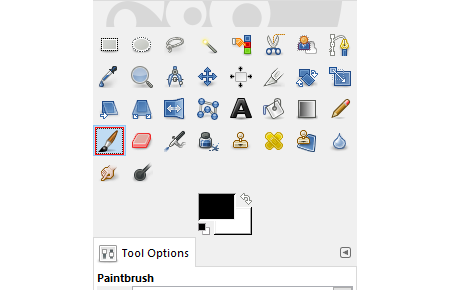 picture 5
Calling the script
-
" / Script-Fu / Pixels! Effect / Pixels! ..."
(picture 6) picture 6
4. The script window
- Now you can run the script with "OK"
- Depending on the size of your image could take several minutes.
- The script in action:
- youtube.com
- inspired by Pixels (Photoshop action script).
If you benefit from my work, please, support my work.
")
Terms & Conditions
Subscribe
Report